Introduction
Overview of Bow Arrow Cupcake Recipe
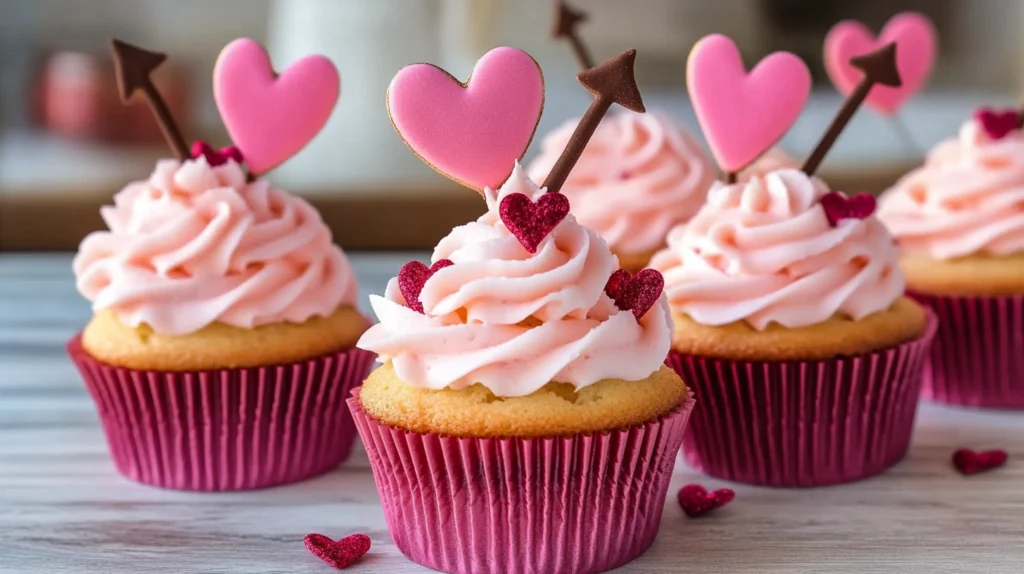
If you’re looking to impress at your next party or family gathering, the Bow Arrow Cupcake Recipe is a fun and visually stunning treat that truly hits the target! I remember the first time I baked these delightful cupcakes for my niece’s birthday; her face lit up when she saw the adorable designs, making all the effort worthwhile.
These cupcakes are not just about looks – they’re packed with flavor too! Imagine sinking your teeth into a moist, fluffy cupcake topped with a rich, creamy frosting, all adorned with charming fondant arrows and bows. It’s a delightful blend of creativity and taste that both kids and adults will enjoy.
Transforming simple ingredients into a work of art – that’s the magic of baking these Bow Arrow Cupcakes. Each arrow and swirl tells a story, and I can’t wait for you to experience the joy of making them! Sarah J., Food Enthusiast
Here’s a little breakdown of what makes this Bow Arrow Cupcake special:
- Fun and Thematic: Perfect for birthday parties, baby showers, or any celebration with a theme.
- Customizable Flavors: You can switch out the cupcake batter flavors to suit your preference. Vanilla, chocolate, or even red velvet can steal the show!
- Easy to Assemble: While the decorations look intricate, don’t worry – they’re easier to make than you might think!
- Perfect for Sharing: These cupcakes are great for social gatherings, making them easy to share and impress your guests.
In the following sections, I’ll guide you through the ingredients, the preparation process, and finally, how to assemble these charming Bow Arrow Cupcakes. Let’s get started on crafting these yummy masterpieces!
Ingredients Required For Bow Arrow Cupcake
List of Ingredients for Cupcake Batter
Getting our ingredients together is where the fun really starts! For my Bow Arrow Cupcakes, I’ve curated a simple yet delicious list that ensures every bite is packed with flavor. Below, you’ll find everything you need for the cupcake batter:
| Ingredient | Quantity |
|---|---|
| All-purpose flour | 1 ½ cups |
| Granulated sugar | 1 cup |
| Baking powder | 1 ½ teaspoons |
| Salt | ½ teaspoon |
| Unsalted butter | ½ cup (softened) |
| Eggs | 2 large |
| Milk | ½ cup |
| Vanilla extract | 1 teaspoon |
I love how straightforward this list is! The best part about these ingredients is that most people have them on hand in their kitchen, making this recipe even more accessible.
Ingredients for Frosting and Decorations
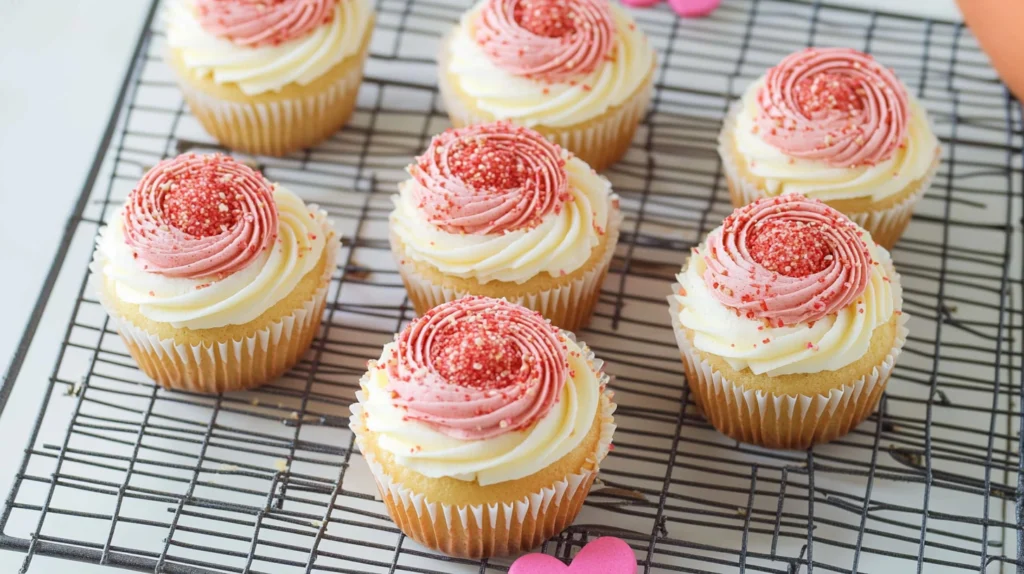
Once the cupcakes are baked, we can dive into the fun and creative side of decorating. Here’s what you’ll need for the frosting and the adorable arrow decorations:
| Ingredient | Quantity |
|---|---|
| Unsalted butter | 1 cup (softened) |
| Powdered sugar | 4 cups |
| Heavy cream | 2-3 tablespoons |
| Vanilla extract | 1 teaspoon |
| Fondant | Assorted colors (for arrows) |
| Edible glitter (optional) | To taste |
When I first made these cupcakes, I considered the decorations to be a bit daunting. However, with the right ingredients and a little imagination, I found it to be therapeutic! The edible glitter adds a touch of magic that makes each cupcake truly irresistible.
The Bow Arrow Cupcakes aren’t just a treat, they’re a celebration of creativity. They’re easy to make, fun to decorate, and impossible to resist. Your next gathering is going to be unforgettable! Mark D., Party Planner
With our ingredients lined up, we’re one step closer to whipping up these delightful Bow Arrow Cupcakes. Let’s move on to preparing the cupcake batter!
Preparation of Cupcake Batter
Steps to Mix and Prepare Cupcake Batter
Now that we have our ingredients ready to go, it’s time to whip up the cupcake batter! This step is not only satisfying but also sets the foundation for our delicious Bow Arrow Cupcakes. Here’s how I prepare the batter step by step:
- Preheat Your Oven: Start by preheating your oven to 350°F (175°C). This ensures the cupcakes bake evenly.
- Mix Dry Ingredients: In a bowl, whisk together the all-purpose flour, baking powder, and salt. This helps distribute the leavening agent evenly throughout the flour.
- Cream Butter and Sugar: In a separate large mixing bowl, beat the softened unsalted butter and granulated sugar using an electric mixer until the mixture is light and fluffy. This usually takes about 3-4 minutes!
- Add Eggs and Vanilla: Next, mix in the eggs one at a time, ensuring each one is fully incorporated before adding the next. Then, add the vanilla extract for that aromatic flavor.
- Combine Dry with Wet Ingredients: Gradually mix the dry ingredients into the wet mixture, alternating with the milk. I find it’s best to start and end with the dry ingredients, mixing until just combined. These little practices give a fluffier cupcake!
Adding Flavors and Colors
Now that our batter is ready, it’s time for a touch of creativity! This is where you can tailor these cupcakes to your preferences.
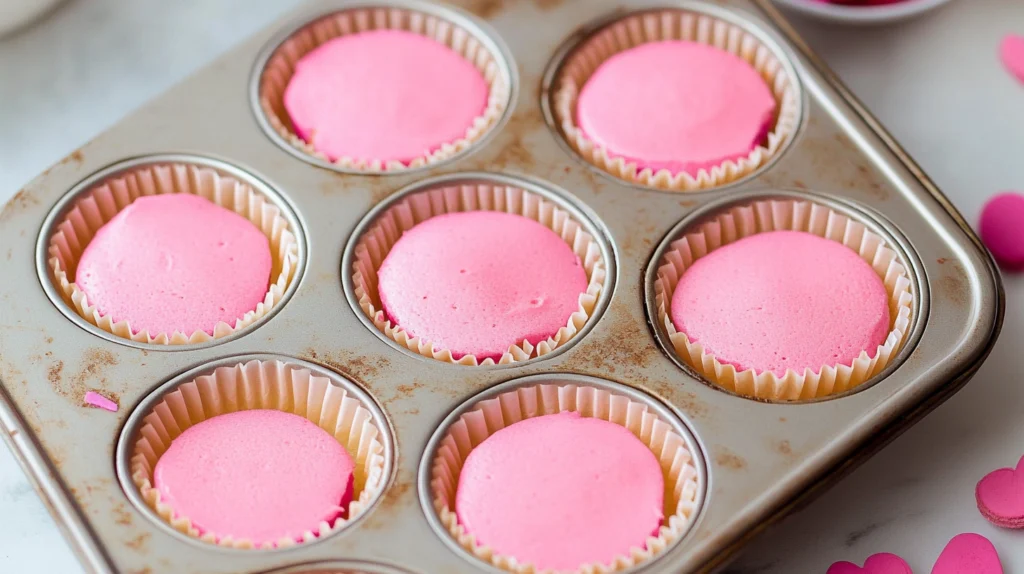
- Flavor Variations: Consider switching the vanilla extract with almond extract for a different twist!
- Coloring the Batter: To make the cupcakes even more exciting, divide the batter into portions and add food coloring to achieve vibrant hues. You can create a rainbow effect or stick to your event’s color scheme!
I remember experimenting with colors the first time I made these cupcakes—it was like painting with cake batter! No matter what flavors or colors you choose, this preparation phase is where the magic happens. Now, let’s move on to baking these delightful cupcakes!
Baking the Cupcakes
Temperature and Baking Time
With our colorful batter all set, it’s time to take the next exciting step—baking those cupcakes! Preheating the oven to the right temperature is key to ensuring they rise beautifully and bake evenly. Here’s how I go about it:
- Preheat the Oven: Make sure your oven is preheated to a cozy 350°F (175°C). This step not only prepares the oven’s heat but also creates that wonderful aroma as the cupcakes cook.
- Fill the Cupcake Liners: Line a cupcake tray with paper liners and fill each one about two-thirds full with our delicious batter. I find using an ice cream scoop is perfect for portioning – it minimizes mess and keeps my measurements consistent!
- Baking Time: Pop the tray into the oven and let them bake for about 18-20 minutes. This timeframe typically results in perfectly fluffy cupcakes.
From the moment I first made these cupcakes, I knew they were going to be a hit. They’re more than just delicious, they’re an experience. Every bite is a perfect blend of flavor and fun! – Emily R., Home Baker
Checking for Doneness
As the tempting scent of baking cupcakes fills your kitchen, you might start peeking into the oven—trust me, I do too! Here’s how I check for doneness:
- The Toothpick Test: After about 18 minutes, I grab a toothpick and gently insert it into the center of one of the cupcakes. If it comes out clean or with a few moist crumbs, they’re ready!
- Spring Test: Another method I use is to lightly press the top of a cupcake. If it springs back, they’re good to go!
A little tip from me: if your cupcakes need an extra minute or two in the oven, keep an eye on them to avoid overbaking. Nothing strikes fear in my heart like dry, crumbly cupcakes! Once done, remove the tray and let them cool completely on a wire rack before we move on to the most exciting part—the decorations!
Making the Arrow Decorations
Creating Fondant Arrows
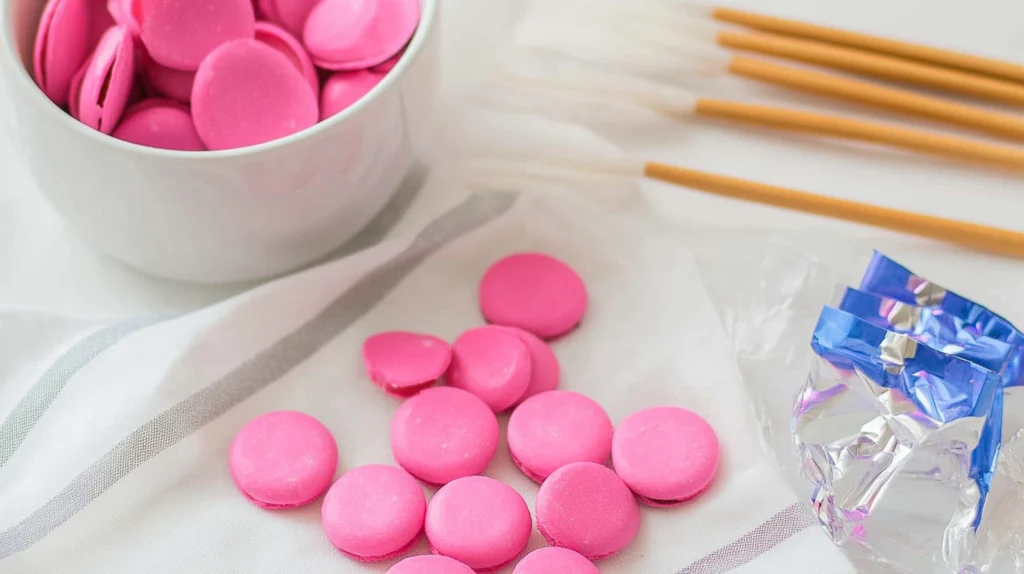
Now that our cupcakes are perfectly baked and cooled, it’s time to transform them into adorable Bow Arrow Cupcakes! One of my favorite parts of this whole process is creating the fondant arrows. It’s where the creativity really shines! Here’s how to make these charming decorations:
- Gather Your Fondant: Start with some store-bought fondant in your desired colors. For a classic look, I often go for red and brown.
- Knead and Roll: Knead the fondant until it’s soft and pliable, then roll it out on a clean surface to about 1/8 inch thick. I love how relaxing this step is—kind of like playing with dough but with a creative twist!
- Cut Out Arrow Shapes: Using a sharp knife or arrow-shaped cookie cutter, cut out arrowheads and fletching (the feathers part). You’ll want to cut two shapes for each arrow you’ll be placing on the cupcakes.
- Assemble the Arrows: Carefully press the shapes together to form complete arrows. You can even use a bit of water to adhere them if needed. Once they’re assembled, set them aside to dry for a bit.
Using Edible Glitter and Paint for Details
Once your fondant arrows are ready, it’s time to add that magical touch with edible glitter and paint! This step elevates the decorations and gives them that extra shimmer.
- Edible Paint: I love using edible gold or silver paint to brush on details or outlines on the arrows. It adds an elegant touch! Just use a clean brush and apply thin layers for the best effect.
- Applying Edible Glitter: If sparkles are more your style, a light dusting of edible glitter can transform simple arrows into eye-catching decorations. Just sprinkle on top while the paint is still wet so it sticks nicely!
I never forget the first time I added glitter to my cupcake decorations—the sparkle was mesmerizing! The joy of creating these little works of art is one of the best parts of baking. With our fondant arrows complete, we’re set for the final assembly and frosted goodness on those cute cupcakes!
Assembling and Frosting
Steps to Frost Cupcakes
With our fondant arrows all set and ready to go, it’s time for the delicious final touch—frosting the cupcakes! I love this part of the process, as it transforms each cupcake into a mini masterpiece. Here’s how I do it:
- Make the Frosting: I typically whip up a batch of buttercream frosting using softened unsalted butter, powdered sugar, heavy cream, and a splash of vanilla extract. Beat it all together until fluffy and smooth; it’s hard to resist stealing a spoonful when it’s just right!
- Choose Your Style: There are various ways to frost cupcakes. I usually opt for a classic swirl using a piping bag fitted with a star-shaped nozzle for a beautiful finish. This not only looks delightful but also creates perfect layers for holding our arrow decorations.
- Frosting Technique: Start by piping a circle around the edge of the cupcake, then spiral inward to create a little tower. Don’t worry if it’s not perfect—my first attempts were definitely wobbly, but that just adds to the charm!
- Smooth Finish (Optional): If you prefer a smoother look, you can use a spatula to spread the frosting evenly across the top. This technique gives a stunning, clean finish.
Placing Arrow Decorations
Now comes the moment I always look forward to—placing the fondant arrows! This is where your cupcakes start to truly resemble the Bow Arrow theme:
- Positioning Arrows: Once each cupcake is frosted, gently insert one or two fondant arrows into the frosting. I usually place them at a slight angle for a dynamic look.
- Adding Extra Flair: For some additional decor, you can sprinkle edible glitter over the frosting before adding the arrows, giving your cupcakes a magical appeal.
Remember the thrill of finishing your project? Seeing the arrows atop those fluffy swirls brings back that joy for me. I can’t wait to see how these adorable Bow Arrow Cupcakes turn out! With the assembly complete, we’re just a step away from showcasing these beauties.
Presentation Tips of Bow Arrow Cupcake
Displaying Cupcakes Creatively
Once my Bow Arrow Cupcakes are all frosted and decorated, it’s time to think about how to display them! A great presentation enhances the overall experience, and I absolutely love getting creative at this stage. Here are some fun ideas from my cake-decorating adventures:
- Themed Stands: I often use decorative cake stands or tiered trays for a visually appealing arrangement. For a Bow Arrow theme, a rustic wooden stand will perfectly complement the aesthetic.
- Cupcake Wrappers: Consider using pretty cupcake wrappers that match your color scheme. I’ve found that wrappers made from patterned paper or in metallic finishes add extra flair to the display.
- Greenery Accents: Surrounding the cupcakes with fresh herbs or simple greenery creates a delightful touch. I love using mint leaves or small sprigs of rosemary for a fresh, vibrant look!
Let’s not forget to enhance the display with thematic elements like bows, arrows, or even small flags that might match your occasion. These little touches can go a long way in making your desserts stand out.
Serving Suggestions For Bow Arrow Cupcake
When it comes time to serve these delightful cupcakes, I always think about practicality mixed with presentation. Here are my favorite serving suggestions:
- Individual Servings: Place each cupcake in its own paper liner for easy grab-and-go serving. It makes it simpler for guests to mix and mingle without the need for plates.
- Accompanying Treats: Pair the cupcakes with themed snacks or drinks. For example, serve them alongside some refreshing lemonade or a fruit platter—this adds variety to your dessert offering!
- Tags for Personal Touch: For parties, consider adding little tags next to each cupcake, listing the flavors or leaving a sweet note. It’s a fun way to engage guests!
I remember the buzz of excitement when I set out my cupcakes, and watching friends’ eyes light up is a feeling I cherish. With these presentation tips, I’m sure your Bow Arrow Cupcakes will be the hit of the gathering!
Storage and Shelf Life
Proper Storage for Cupcakes
After all the hard work in baking and decorating my Bow Arrow Cupcakes, the last thing I want is for them to go stale! Proper storage is essential to maintain their freshness and flavor. Here’s how I ensure my cupcakes stay delicious for as long as possible:
- Cool Completely: Always let your cupcakes cool completely before storing them. Storing them while warm can create condensation, leading to soggy tops.
- Use an Airtight Container: I find that placing the cupcakes in an airtight container is the best option. You can layer parchment paper between them to prevent sticking, especially if they’re frosted.
- Choosing the Right Temperature: For short-term storage (up to a couple of days), I leave them at room temperature. However, if you need to store them for longer, I recommend placing them in the fridge.
- Avoid Squeeze: Be careful not to squish the arrows or frosting when storing! If you need to stack them, use a cupcake carrier designed for that purpose.
Shelf Life of Decorated Cupcakes
Knowing how long my cupcakes can last is super helpful, especially with gatherings or leftovers. Here’s a quick breakdown I’ve discovered over the years:
- Room Temperature: Unfrosted cupcakes typically last about 3-4 days at room temperature. Decorated cupcakes with buttercream frosting can last around 2-3 days.
- Refrigerated: If you refrigerate your cupcakes, they can last for about a week. However, the texture might change slightly, so just be aware of that!
- Freezing Options: For longer storage, you can freeze unfrosted cupcakes. They freeze beautifully for up to 3 months! Just wrap them tightly in plastic wrap and aluminum foil.
I can’t tell you how many times I’ve baked too many cupcakes for an event and had to navigate leftovers. Storing them properly means I can enjoy my creations for days to come! Ultimately, just ensure they’re kept in a safe spot away from moisture and direct sunlight, and they’ll stay delicious for your next indulgent treat.
Print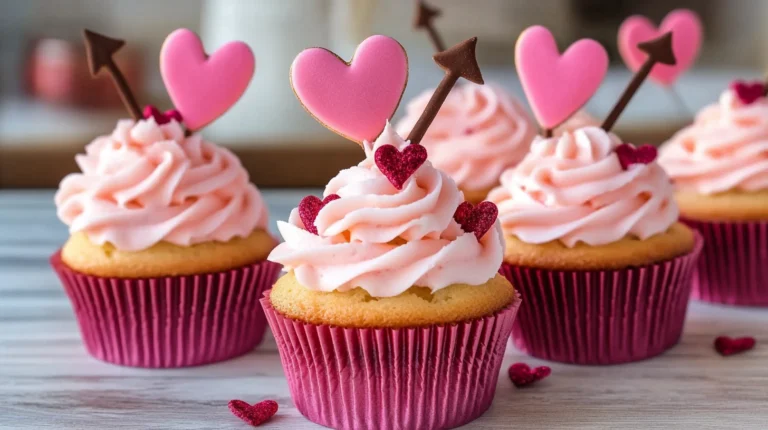
Irresistible Bow Arrow Cupcake Recipe: Perfet for Valentine’s Day
Bow Arrow Cupcakes are a fun and visually stunning treat, perfect for themed parties or family gatherings. With customizable flavors, creative fondant arrows, and fluffy frosting, they’re as delightful to make as they are to eat!
- Total Time: 50 min
- Yield: 12 cupcakes 1x
Ingredients
For Cupcake Batter:
- 1 ½ cups all-purpose flour
- 1 cup granulated sugar
- 1 ½ teaspoons baking powder
- ½ teaspoon salt
- ½ cup unsalted butter (softened)
- 2 large eggs
- ½ cup milk
- 1 teaspoon vanilla extract
For Frosting and Decorations:
- 1 cup unsalted butter (softened)
- 4 cups powdered sugar
- 2–3 tablespoons heavy cream
- 1 teaspoon vanilla extract
- Fondant (assorted colors for arrows)
- Edible glitter (optional)
Instructions
- Preheat oven to 350°F (175°C). Line a cupcake tray with paper liners.
- Whisk dry ingredients together (flour, baking powder, salt).
- Cream butter and sugar until light and fluffy. Add eggs one at a time and vanilla extract.
- Alternate adding dry ingredients and milk, mixing until just combined.
- Divide batter into portions and color (optional).
- Bake for 18-20 minutes, check doneness with a toothpick or spring test.
- Cool completely before frosting.
- Prepare frosting and pipe onto cooled cupcakes.
- Create fondant arrows and add edible glitter for extra flair.
- Place fondant arrows onto frosted cupcakes and serve!
Notes
- Customize flavors by swapping vanilla extract for almond extract.
- Add food coloring to create vibrant batter for themed events.
- Be sure to let cupcakes cool completely before decorating to avoid soggy tops.
- For a magical touch, use edible glitter and paint on the fondant arrows.
- Prep Time: 30 min
- Cook Time: 20 min
- Category: Dessert
- Method: Baking
- Cuisine: American
- Diet: Vegetarian
Nutrition
- Serving Size: 1 cupcake
- Calories: 350
- Sugar: 28g
- Sodium: 120mg
- Fat: 18g
- Saturated Fat: 9g
- Unsaturated Fat: 7g
- Trans Fat: 0g
- Carbohydrates: 45g
- Fiber: 1g
- Protein: 3g
- Cholesterol: 45mg
Conclusion
Recap of Bow Arrow Cupcake Recipe
As we wrap up this delightful journey through the Bow Arrow Cupcake Recipe, I hope you’re feeling inspired to dive into the world of baking and decorating! We started with simple yet essential ingredients, transformed them into fluffy cupcakes, and then added a touch of creativity with fondant arrows and frosting swirls. Here’s a quick recap of our steps:
- Ingredients: From the cupcake batter to the vibrant frosting, each element was carefully chosen for maximum flavor.
- Baking Process: We baked those cupcakes to perfection, ensuring they were light and fluffy.
- Decorating: The fun began when we crafted our fondant arrows and enhanced them with edible glitter, resulting in stunning, eye-catching treats.
- Presentation: Finally, we discussed creative ways to display and serve these cupcakes, making sure they stand out at any event.
Each phase was a joyful experience, and I must say, seeing those finished cupcakes is a reward in itself!
Final Thoughts on Creativity
One of the most beautiful aspects of baking is the ability to express creativity. With the Bow Arrow Cupcake Recipe, I found a way to blend delicious treats with a visual theme that tells a story. I often think back to my niece’s birthday party when the cupcakes stole the show; their whimsical design and delightful taste brought everyone together in celebration.
I encourage you to experiment with your baking—perhaps trying different flavors, personalized decorations, or even thematic variations for your gatherings. Let your imagination run wild! Remember, there are no strict rules—only delicious possibilities waiting to be explored.
So, gather your ingredients, unleash your creativity, and most importantly, enjoy every moment of the process. Happy baking!
